Claim Flare Tokens
Flare Network with its native asset Flare (FLR) launched in 2022. Flare uses the Ethereum Virtual Machine for smart contract functionality and a similar consensus algorithm as Avalanche. Flare is designed to bring utility to Flare, through collateralization of assets, data provision, governance and spam prevention via transaction fees.
![]()
Claim Period Over
The snapshot occurred on XRP Ledger index 60,155,580 and the Flare (FLR) claim period ended on XRP Ledger index 64,204,315. Eligible users' last valid message key was used for the initial Flare (FLR) distribution.
You can use Bifrost Wallet to send, receive and delegate Flare tokens. You can find more information at bifrostwallet.com.
XRP Ledger Snapshot
At the inception of the Flare Network 100 billion Flare was created. Part of this was distributed to XRP holders, depending on their XRP balance on 12th December 2020, 00:00 UTC and if they configured a message key in time. Users had until 11th June 2021, 23:59 UTC to configure a message key with their desired Flare address. For additional details about the Flare token distribution see the FIP-1 reference guide and the FlareDrop guide.
FlareDrop Information
It is no longer possible to claim Flare by setting a message key on the XRP Ledger. Distributions are now made to Wrapped Flare (WFLR) token holders on the Flare Network.
The Flare Network uses the same address format as the Ethereum Network. You use an address from an Ethereum wallet to produce a message key and claim Flare tokens. The same wallet will later be used on the Flare Network to access your Flare tokens, make sure you have a backup of the secret key or recovery words.
Step 1: Get Wallet
Ethereum wallets that will support the Flare Network includes MetaMask, Keystone, D'CENT Biometric Wallet, Ledger Nano X and Ledger Nano S. The listed wallets work with coming Flare applications, similar to how Uniswap supports MetaMask. If you don't have any of the listed wallets, either download MetaMask, get a Keystone, D'CENT Biometric Wallet, Ledger Nano X or Ledger Nano S.
You can use an Ethereum wallet not listed above, just make sure that you have a backup of the secret key or recovery words. If your chosen wallet turns out to be incompatible with the Flare Network, you'll be able to use your secret key or recovery words to migrate your claimed Flare tokens to a new wallet.
Step 2: Copy Address
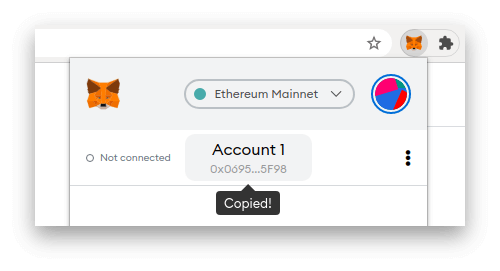
Once you have an Ethereum wallet to which you hold the secret key or recovery words, it's time to copy your address. We recommend using a new address holding no assets. If you're using the MetaMask browser extension, open the extension and click on your address, see the screenshot below.
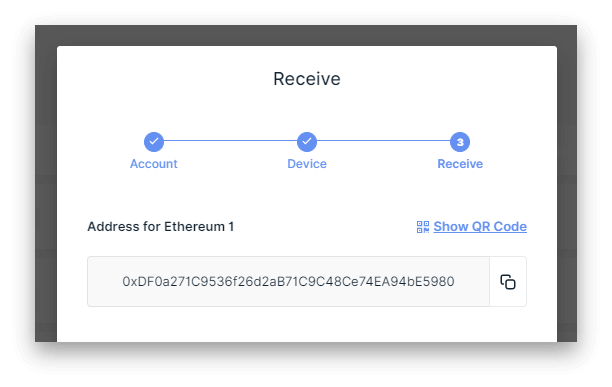
If you're using a Ledger Nano X or Ledger Nano S, plug in your device, unlock it, open Ledger Live and install any pending updates. Then click Receive, select your desired Ethereum account, click Continue and copy the displayed address.
For the D'CENT Wallet, see the official D'CENT Wallet instructions. Most other wallets work like MetaMask and Ledger, you'll need to find and copy the Ethereum address that you'd like to use on the Flare Network. Your claimed Flare tokens will be distributed to this address on the Flare Network after launch. From now on, we'll refer to your copied address as your Flare address.
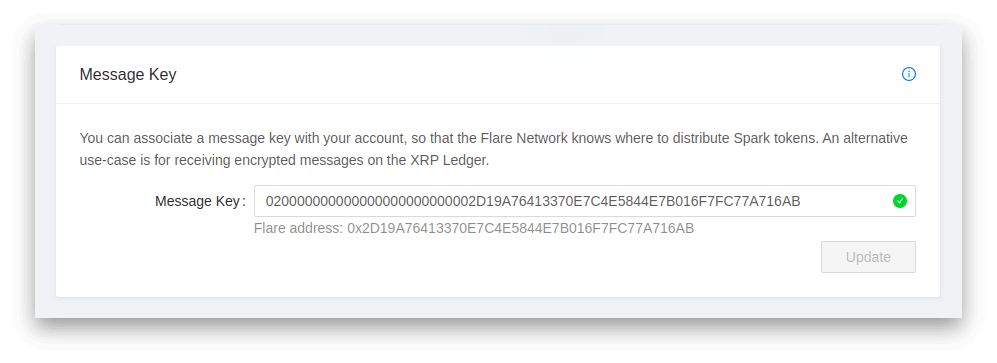
Step 3: Set Message Key
Once you've copied your Flare address, open XRP Toolkit and connect your XRP wallet. Go to Properties in the Account menu and paste your copied address in the message key field. XRP Toolkit will offer to convert your Flare address to the required format for storing it as a message key on the XRP Ledger. Click on the suggested format, then click the Update button to proceed.
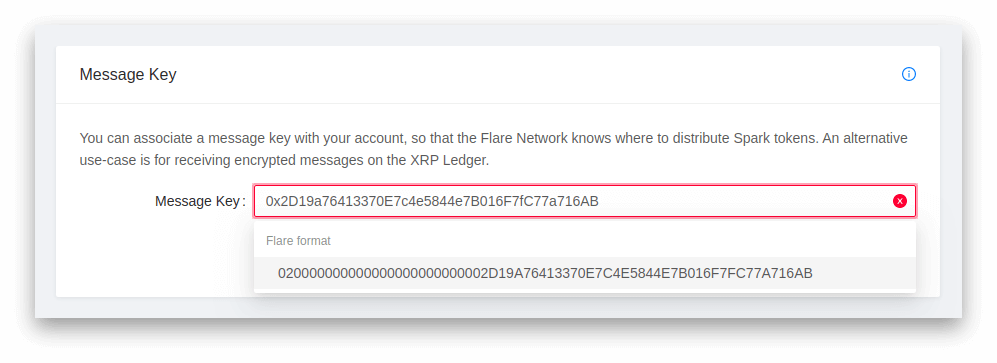
If you want to manually convert your address to the required message key format, start by removing "0x" and convert the remaining part to all uppercase, finally add the prefix "02000000000000000000000000". As an example, the Ethereum address 0x2D19a76413370E7c4e5844e7B016F7fC77a716AB corresponds to the message key 020000000000000000000000002D19A76413370E7C4E5844E7B016F7FC77A716AB.
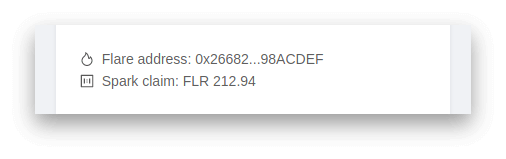
After clicking the Update button, you'll be asked to review the transaction. Carefully review all transaction details in your connected wallet and only confirm if the message key corresponds to your intended address. Once the transaction has been signed and submitted, you're all set for the Flare distribution. You can see your Flare address and claimed Flare amount on the XRP Toolkit account overview. You can double-check your Flare address by entering your XRP account address in a transaction explorer like XRP Scan or Bithomp.