Connect Wallet
You can connect and manage multiple wallets using XRP Toolkit. For every connected wallet, the public account address will be read and stored locally by your browser, until you clear your session. This allows you to view your balances and transactions without connecting your wallet every time. Open the connect wallet view by clicking on "Connect Wallet" from the landing page or by visiting: https://www.xrptoolkit.com/connect-wallet
Security Reminder
XRP Toolkit will never ask for secret keys, secret numbers, recovery words or other wallet credentials.
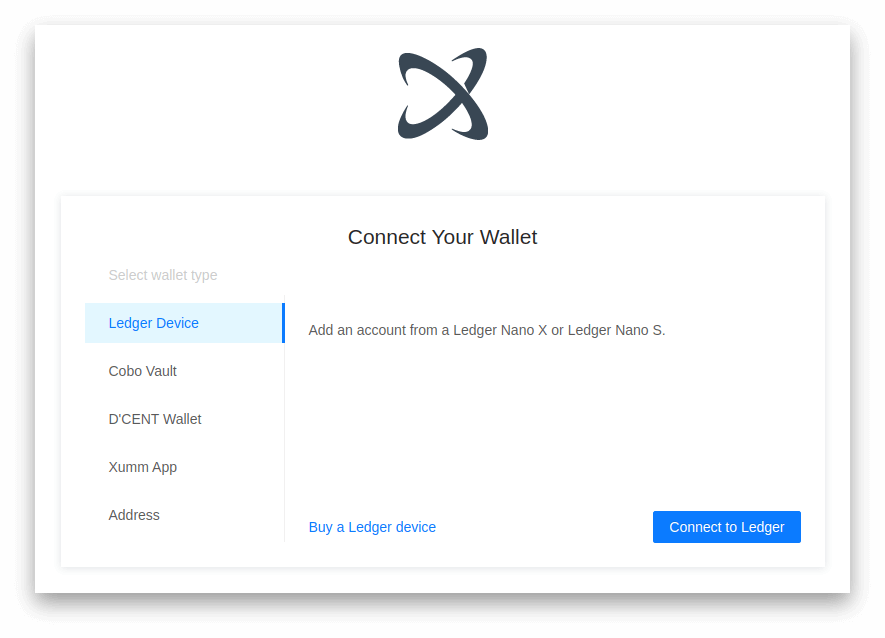
In the connect wallet view, select what type of wallet you would like to use. XRP Toolkit currently supports: Bifrost Wallet, Ledger Nano X, Ledger Nano S, Keystone, D'CENT Wallet, Xaman and account address (view only).
Bifrost Wallet
Using Bifrost Wallet together with XRP Toolkit is the recommended way to store and manage your crypto assets on the XRP Ledger. For the best user experience, we recommend accessing XRP Toolkit from a laptop or desktop computer and connect the Bifrost Wallet app from a separate phone or tablet.
Requirements
Make sure that you have Bifrost Wallet installed on your Android or iOS device. You can find Bifrost Wallet in both Google Play and App Store. You need to create a wallet in the Bifrost Wallet app, before you can use it with XRP Toolkit. You can either create a new wallet or import an existing one from a recovery phrase.
Connect Bifrost Wallet
To use your Bifrost Wallet with XRP Toolkit, follow these simple steps:
- Select Bifrost Wallet in the connect wallet view
- Click on Connect Bifrost Wallet
- Open the Bifrost Wallet app on your phone
- Click the Scan button in the bottom menu and scan the QR code
- Verify that you're logging in to XRP Toolkit before approving the login
Ledger Device
Using XRP Toolkit together with a Ledger hardware wallet to manage your crypto assets is considered an extremely secure option. All transaction signing is done inside your hardware wallet's certified secure chip, enabling you to review all transaction details on the hardware wallet's embedded display, before accepting or rejecting the transaction with a physical button press.
Requirements
Make sure that your Ledger hardware wallet has the most recent XRP app installed. By keeping your device and XRP app updated, your crypto assets will be better protected and you'll be able to do more with your device.
Updated XRP App
XRP Toolkit requires XRP app version 2.0.0 or later to be installed on your Ledger device. You can install the latest firmware and XRP app through Ledger Live, see the official upgrade instructions and our summary below:
- Click on Manager in Ledger Live
- Connect and unlock your device
- If asked, allow the manager on your device
- Find XRP in the app catalog
- Click the Install button for the XRP app
- An installation window will appear
- Your device will display Processing...
- The app installation is now complete
Supported Browser
Ledger devices require advanced authentication features available in most modern browsers, except for Internet Explorer and Safari. We recommend using Google Chrome for best security and full compatibility.
Connect Ledger Device
To use your Ledger Nano X or Ledger Nano S hardware wallet with XRP Toolkit, follow these simple steps:
- Plug in and unlock your Ledger device
- Open the XRP app on your Ledger device
- In XRP Toolkit, select Ledger Device in the connect wallet view
- In XRP Toolkit, click on Connect Ledger
- Google Chrome will spawn a selection box.
- Select your Ledger device and click Connect.
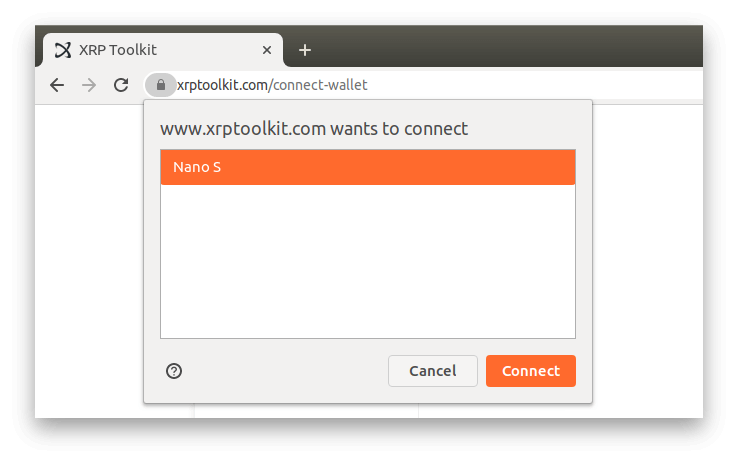
If your device doesn't appear in the selection box, make sure you're meeting all requirements and following the instructions above. If you see a popup from Windows, see the troubleshooting guide Windows Security Popup. If you're experiencing other connection issues follow Ledger's troubleshooting guide.
Keystone
Using XRP Toolkit together with a Keystone to manage your crypto assets is considered an extremely secure option. All transaction signing is done inside your hardware wallet's certified secure chip, enabling you to review all transaction details on the hardware wallet's embedded display, before accepting or rejecting the transaction on your Keystone.
Requirements
Make sure that your Keystone is running the most recent firmware version. By keeping your device updated, your crypto assets will be better protected and you'll be able to do more with your device.
Updated Firmware
XRP Toolkit requires Keystone multi-coin firmware M-5.0 or later. You can download the latest device firmware from Keystone's website, see upgrade instructions.
Webcam Access
All communication between XRP Toolkit and your Keystone is done using QR codes. Your device must have a webcam and you must grant your browser permission to use it.
Connect Keystone
To use your Keystone hardware wallet with XRP Toolkit, follow these simple steps:
- Turn on and unlock your Keystone
- Select XRP Toolkit from the Watch-only Wallet menu on your Keystone
- Click Display QR Code on your Keystone
- In XRP Toolkit, select Keystone in the connect wallet view
- In XRP Toolkit, click on Scan Keystone and scan the QR Code
If you experience connection issues, please see the Keystone connection guide.
D'CENT Wallet
Using XRP Toolkit together with a D'CENT biometric wallet to manage your crypto assets is considered an extremely secure option. All transaction signing is done inside your hardware wallet's certified secure chip, enabling you to review all transaction details on the hardware wallet's embedded display, before accepting or rejecting the transaction on your D'CENT wallet.
Requirements
Make sure that your D'CENT wallet is running the most recent firmware version. By keeping your device updated, your crypto assets will be better protected and you'll be able to do more with your device.
Installed Bridge
D'CENT biometric wallet requires advanced web features only available in Google Chrome and a bridge service only available to Windows and macOS users. You can download and install the required bridge service from: bridge.dcentwallet.com.
Updated Firmware
XRP Toolkit requires D'CENT firmware v2.4.0 or above, earlier versions only support payments and cannot be used with XRP Toolkit. You can download and install the latest D'CENT firmware from: fwu.dcentwallet.com.
Connect D'CENT Wallet
To use your D'CENT biometric wallet with XRP Toolkit, follow these simple steps:
- Plug in, turn on and unlock your D'CENT wallet
- In XRP Toolkit, select D'CENT Wallet in the connect wallet view
- In XRP Toolkit, click on Connect D'CENT
Xaman Wallet
Using Xaman together with XRP Toolkit is a convenient way to store and manage your crypto assets on the XRP Ledger. For the best user experience, we recommend accessing XRP Toolkit from a laptop or desktop computer and connect the Xaman app from a separate phone or tablet.
Requirements
Make sure that you have Xaman installed on your Android or iOS device. You can find Xaman in both Google Play and App Store. You need to add an account to Xaman, before you can use it with XRP Toolkit. You can either create a new account or import an existing one from secret numbers, family seed or mnemonic.
Connect Xaman
To use your Xaman mobile wallet with XRP Toolkit, follow these simple steps:
- Select Xaman Wallet in the connect wallet view
- Click on Connect Xaman
- Open the Xaman app on your phone
- Click the Scan button in the bottom menu and scan the QR code
- Verify that you're logging in to XRP Toolkit before approving the login
Address
You can add any public account address to view its balances, recent transactions, pending escrows and open orders. This applies to any account on the XRP Ledger. To sign a transaction for an added account address, you need to connect a wallet authorized to sign for it.
Add Account Address
- Select Address in the connect wallet view
- Enter or scan the QR code of the address you wish to add
- Click on Add account to confirm