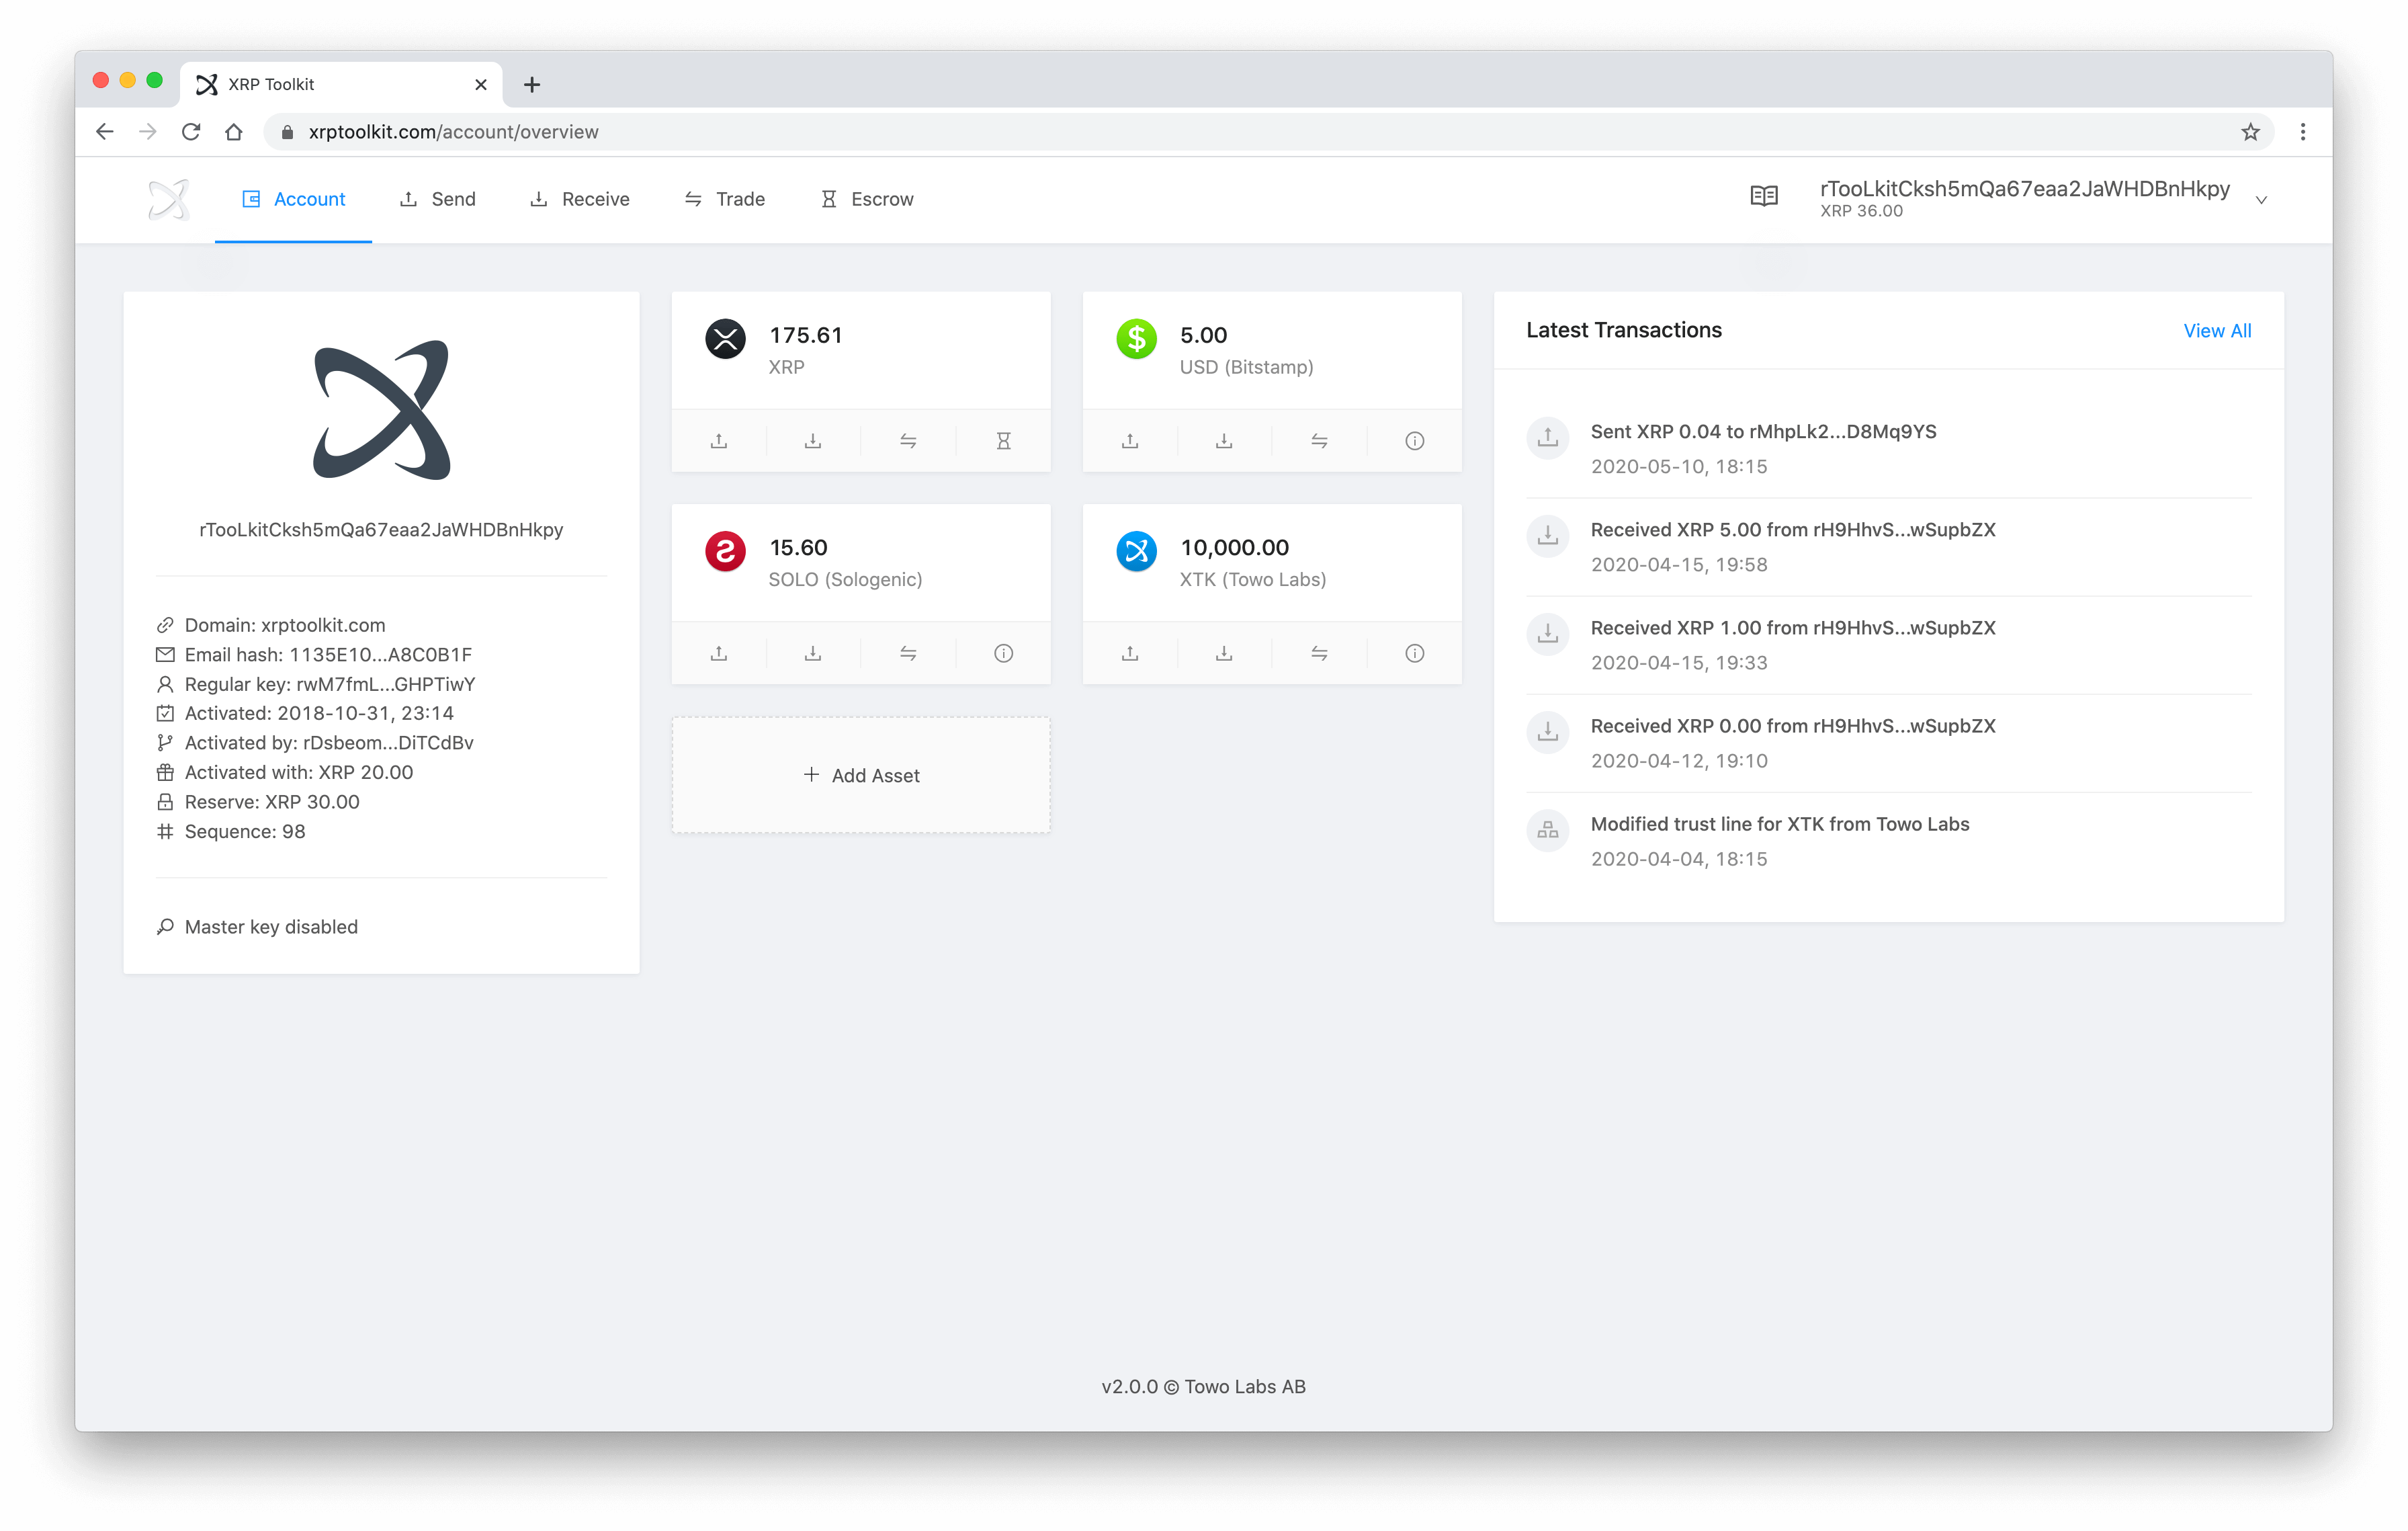
User Interface Overview
The XRP Toolkit user interface primarily consists of three components, a navigation menu to the top-left, an account switcher to the top-right and a content area underneath.
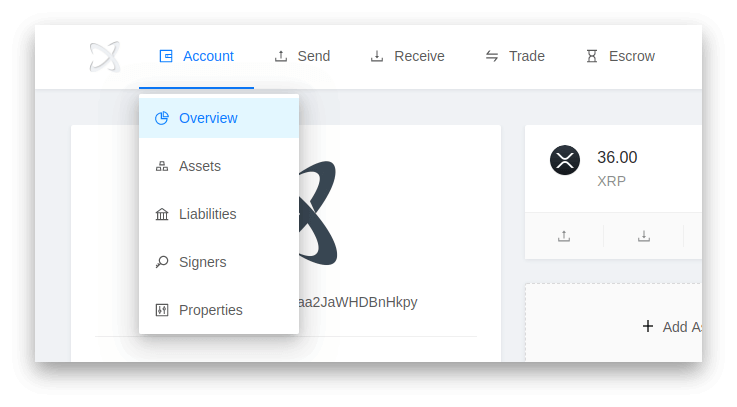
Navigation Menu
The navigation menu consists of an indented XRP Toolkit logo and links to different categories of transactions like payments, trade orders and escrows. The logo takes you back to the landing page. Account contains a submenu for actions related to the account itself, like authorized signers and account properties.
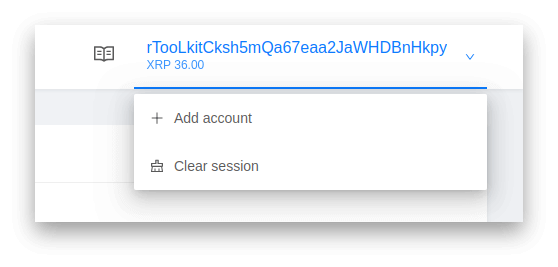
Account Switcher
You can manage multiple accounts using the XRP Toolkit. Use the account switcher to add more accounts, switch active account or clear your session.
Content Area
When using the XRP Toolkit, what you're essentially doing is to prepare different transactions for the currently active account in the content area, this could for example be a payment, trade order or escrow transaction.
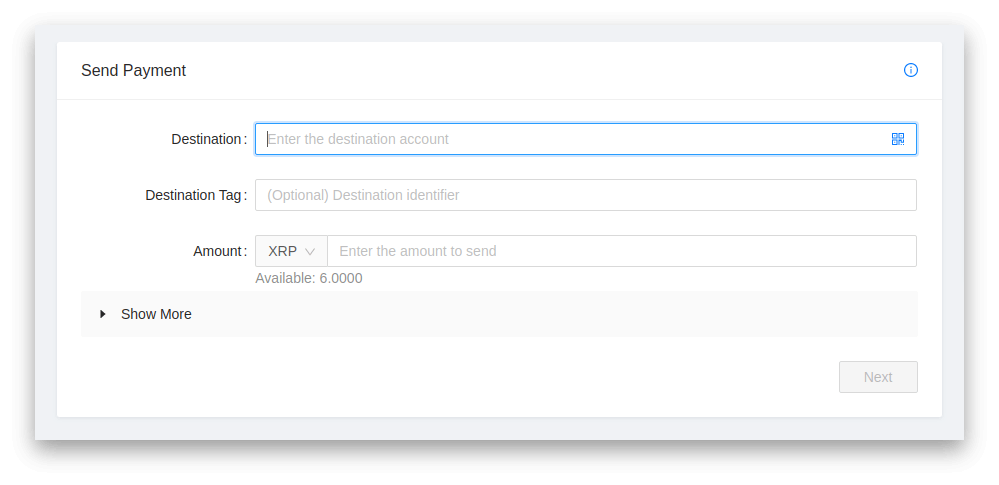
To prepare for example a payment, you'd visit the send view and fill the form with a destination and amount. When you're ready to sign a prepared transaction, click on the corresponding action button, link or toggle.